Contrabass drone for Scottish smallpipes
- Penny Reiswig
- Dec 25, 2024
- 7 min read

Updated: Jun 6, 2025
Last spring i was approached by Nick W, a Scottish piper in Victoria, who was interested in getting closer to the uilleann pipe bass drone sound in his Scottish smallpipes. This seemed like a perfect bagpipe mad science project, so i agreed to give it a try. He plays an A set of smallpipes, and we're aiming for the A drone below his bass A drone. That turns out to be the A1 at 55Hz. It's the A below the bass D drone of the uilleann pipes, which means this is going to be the lowest drone i've ever made. Awesome.
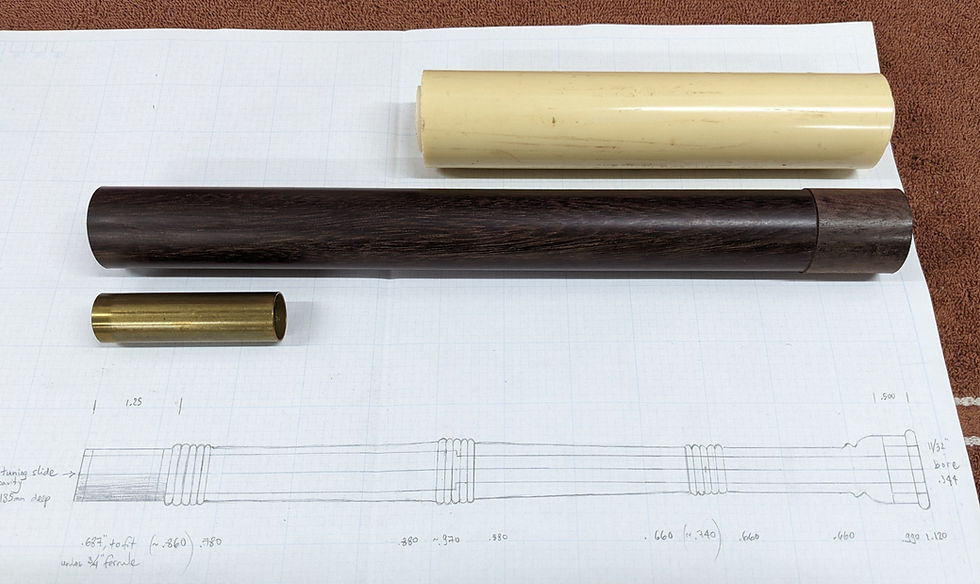
The first thing is to figure out how long a drone we're dealing with. I started with a drawing of a flat uilleann pipe bass drone in B, and scaled it down a whole tone to A. I made a mock up out of brass tube, and it plays just fine at A1 using a random uilleann pipe bass drone reed in my box. One problem: it's six feet long.

So yeah, the main puzzle here is to try to fit six feet of contrabass drone into a Scottish smallpipe. In this case, i want to have a pretty normal looking bass outer section, and keep the weight as close to the bag as i can. My proposed solution is to use a multi-bored "shuttle" style standing part. In this case, in order to keep the length under control, i am going to aim for five bores inside the standing part at 10.5" long. I revised my brass model to have the standing part divided into five equal length sections to confirm it still works, so the bores can graduate through the drill series.

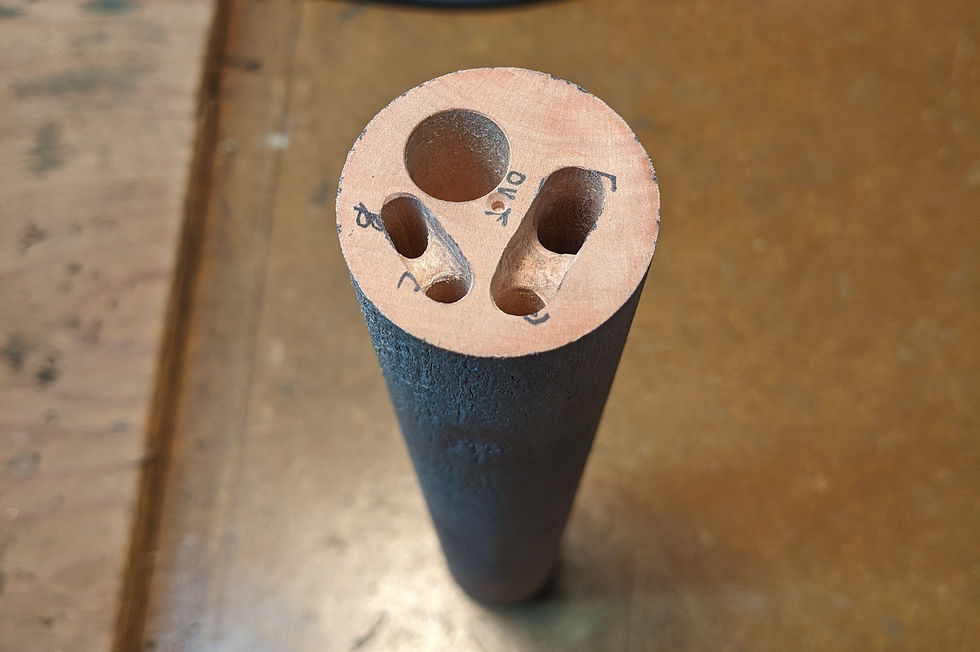
This is how i do my drilling layouts. Each drill has a safety margin (the red circles) to allow for drill wandering, so the bores don't intersect. The outer diameter is about 1.4" and hopefully that will be small enough to fit acceptably into a set of smallpipes. In order to transfer this drill layout so it matches on both ends of a wooden workpiece, i made this little jig. (From here, i'll be working through all this on a prototype in dogwood.)

Once the marks are laid out, i can take the workpiece to the lathe and drill the holes. There are of course many ways to approach drilling a piece like this. I'm electing to cut the workpiece in half, and drill the five bores from the centre of the piece to each outer end, then glue them back together. This way i hope to minimise drill wandering over the full 10.5". Ordinarily i can cope with some wander, but in this project i need to keep the five bores as parallel as possible.

Once all the bores are drilled in each half, i need to carve the passages that connect each bore at the ends. There will be a cap glued on to each end to seal the passages and make one long bore going up and back - and up and back and up.
Here i've made one end cap and the reed tenon. In this case it's made of maple. (Being a prototype, it doesn't really have to match and look good.) It's also removeable, because i will need to try to fit it into Nick's pipes, so i can change the dimensions if i need to.

Both caps are on, and the tuning slide pin is in place (also removeable in case i need to modify it later). Interestingly, the wood prototype with the bends in it plays quite a bit flatter than the straight brass model with the same reed. I'll try making a new reed or two, and i'll try Nick's Ezeedrone bass reed (i haven't used them myself, and don't have any handy.) I'll revise the drawing if it turns out to be necessary. That's the fun of designing and making a new instrument from scratch, as opposed to copying an existing one.

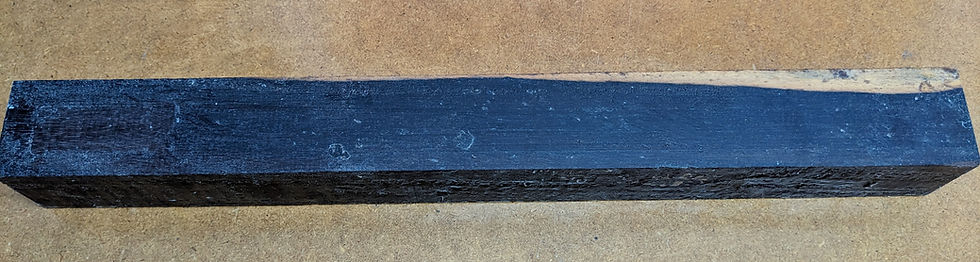
Ok, once more with feeling! I've learned a lot of lessons from the dogwood dry run, so it's time to start the actual piece. This one is going to be made of katalox, a wood from Mexico and Central/South America. It's sometimes known as "Mexican royal ebony" - which is at least 2/3 incorrect: it's not botanically an ebony, and Mexico doesn't have any royalty. Anyway, it is extremely hard and dense, and is sometimes used in place of ebony or African blackwood. I honestly dislike working with blackwood, so i'll be interested to see how katalox compares. Who knows, this could wind up being my new favourite pipemaking wood.
At this stage i have it turned round, and cut into two sections plus the end caps. The gold lines are there to help when putting it all back together after drilling, so everything will align and hopefully the glue lines can be hidden.

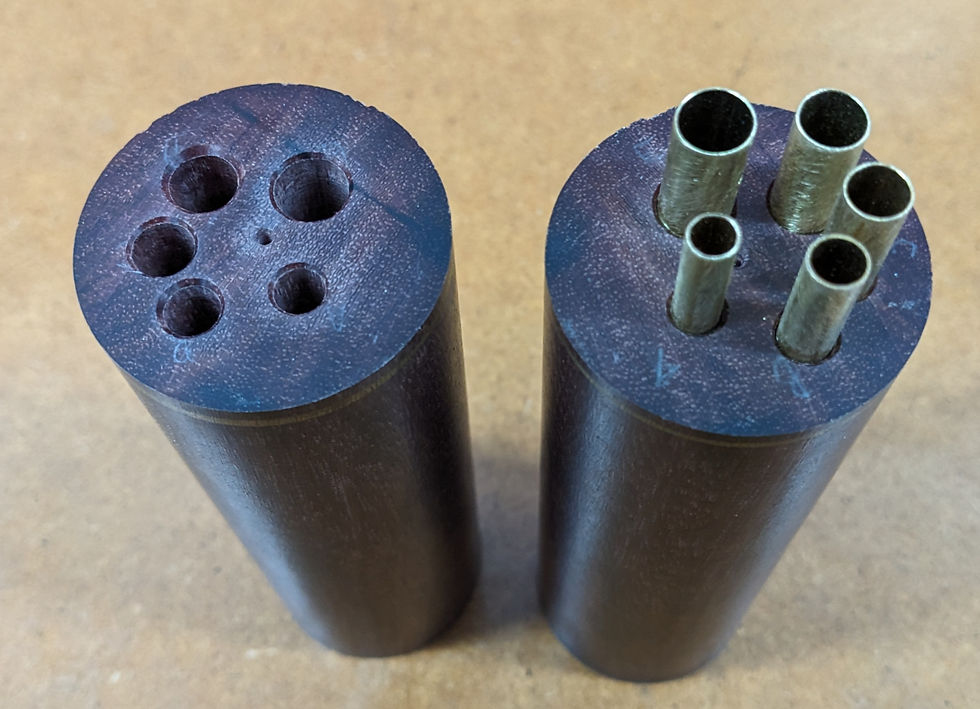
All the bores are drilled. I'm putting in brass tubes at the centre joints, to ensure the bores are completely aligned and continuous, and also to mechanically reinforce what would otherwise be an endgrain-to-endgrain wood joint.
It's finally time to glue the two halves together. I'm using an epoxy that is especially good for oily woods that are otherwise hard to glue. My habit is to slowly turn the piece in the lathe while the epoxy sets up. It allows me to keep the piece aligned, with a nice controlled clamping pressure. I've also somehow gotten it into my head that turning it will keep drips & blobs down, and keep the epoxy from flowing to one side or the other.

Here we are turned and polished. Nick's pipes are made by McCallum Bagpipes, so i'm going to try putting on my McCallum hat for the visuals as much as i can. Obviously this weird big experimental drone is not going to fool anyone that it was made by McCallum (also it's stamped with my name), but i'd like to keep to the flow of the set. If all goes well, that's going to involve some further mad science later on...

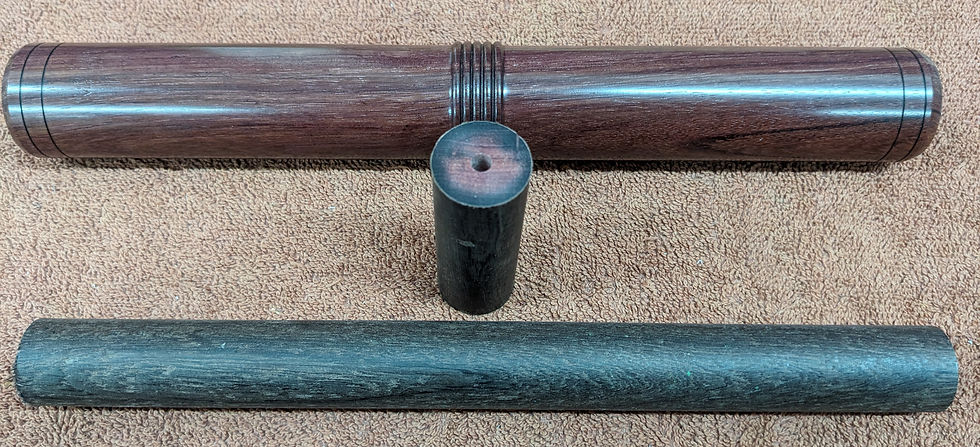
I'm getting ready to make the reed and tuning slide tenons, and i thought this was an interesting photo to include. I've had this piece of katalox sitting here turned round for probably a couple of years, and you can see the fresh cut shows it's quite a bit lighter in colour on the inside, so we can expect all these pieces will darken significantly as the new surfaces are exposed to the air and the light.
The reed seat tenon and tuning slide pin are done and and glued in - that's the whole standing part completed.

Getting going on the sliding part. I've already drilled the wood and have been letting it settle for a bit. I tried to make the drawing based on Nick's McCallum drones. Spoiler alert: my plan/hope/intention is to get some home chemistry going and nickel plate the brass ferrule to match the nickel on the McCallum set.
The sliding part is turned and polished. We're basically done at this point, except for whatever mad science i can get up to on the brass ferrule. I'd like to try to nickel plate it, and i'm also looking into acid etching to see if maybe i can approach a simulation of the Celtic engraving on the McCallum set.

Here we are in ye olde home alchemy lab, brewing up some nickel electroplating. The green solution is nickel acetate, which i made by electrochemically dissolving metallic nickel into 5% acetic acid. Now i'm suspending a brass ferrule in the solution along with another piece of pure nickel, and giving it some more galvanic goodness. The stir plate helps to keep bubbles from lingering on the metal surfaces, which could interfere with the plating process.

And here is the result after about 15 minutes. This is fresh out of the plating bath, no subsequent polishing or buffing. If the surface is nice and clean and polished and shiny going in, it should come back out the same way.

Here is the drone in situ with the rest of the McCallum set. The contrabass drone is plugged in to the socket originally for the middle E drone. So in this configuration we have three octaves of A, much like the uilleann pipes, which was kind of the original plan. I haven't given up on the engraving idea quite yet - i'm up to plan C for homebrew acid etching, with a few avenues still to explore (other than getting a CNC or laser machine involved).

Here is a short sound sample of this set, pretty quick and dirty but it does demonstrate the rich sound of the low low drone. Right now i can't figure out how to include an audio player on a Wix blog page, so for now i will try putting a link to the .mp3 file - just click on the notes below.

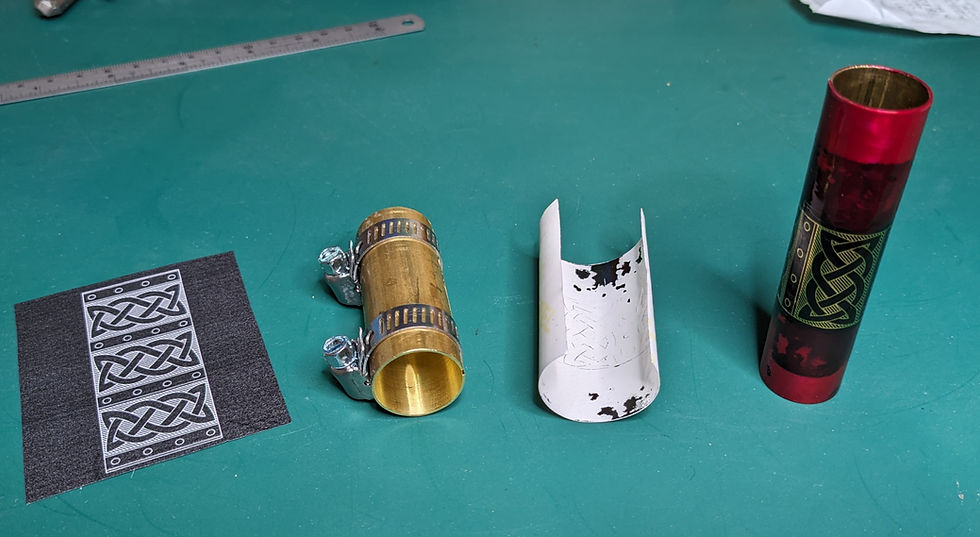
Still working on the final touch of coolness for the ferrule on the sliding part, which is to try to match the engraving on the McCallum pipes. I got this knotwork pattern from the McCallum Bagpipes catalogue, then manipulated it to fit around the ferrule size i need for this drone. I've been investigating and trying several different methods for acid etch resists, mostly from the world of homebrew DIY electronic circuit boards. With this project, the challenge of course is to get a good transfer around a curved surface. So far this is the best one i've achieved. The pattern is printed using a laser printer, then the printed graphic is wrapped around the workpiece. A split tube is slipped over the outside and tightened down. Then the whole thing is baked in the oven for a while. The toner melts and is then stuck on to the metal. In the best case, all the toner gets transferred over, but this is sadly not that case. This one is good enough to work with though, and i'm able to touch things up with nail polish and permanent marker.
And after about 25 minutes in ferric chloride etching solution. Next stop is polishing and then into the nickel plating bath.

Aaaaaand done! On the left is my new contrabass drone, on the right is the McCallum middle drone. When i first started this project i thought it might possibly be interesting to look into eventually trying to learn about nickel plating, but i never imagined i could do this engraving myself without a rotary CNC or laser. It does have some little flaws from my manual touch up spots, but i am incredibly happy with this result.

I'm very happy calling this project a success. It's pretty much unlike anything i've made before, and i've developed several new techniques and working methods along the way which will definitely serve me in the future. I've learned a ton, and i feel like i'm better at pipemaking now than when i started this project. It's certainly helped me climb out of a personal slump and get back to a feeling of purpose and passion in the workshop. Thanks so much to Nick for inviting me to take this particular plunge.

This project is the venn diagram of craft, creativity and deep knowledge of the physics of sound. A heretofore never built smallpipes drone. We are seeing the invention and creation of a new musical instrument!